
March 5, 2026
Why experimentation is becoming an operating model for smart organizations
A conversation with Valentin Radu, founder of Omniconvert, on experimentation as an operating model, AI and sustainable digital growth. Read more

The default page measurements in Google Tag Manager (GTM) are not always sufficient. Often we want to know more than just exit rate, bounce rate and time on page. In this blog series, I will highlight some additional measurements in Google Tag Manager that will help you get even more insights from your data.
Would you like to know how your users interact with your pages and the standard metrics aren't enough? Then try scroll tracking. With scroll tracking you measure how far your visitors scroll down your page. Especially with long pages like a blog page, this is a valuable addition. After all, the scroll percentage is a good indication of how your page is being used.
Setting up scroll tracking has become very easy since GTM added it as a standard feature. I'll explain how to add scroll tracking in a few steps.
Create a new trigger and choose the Scroll Depth type:
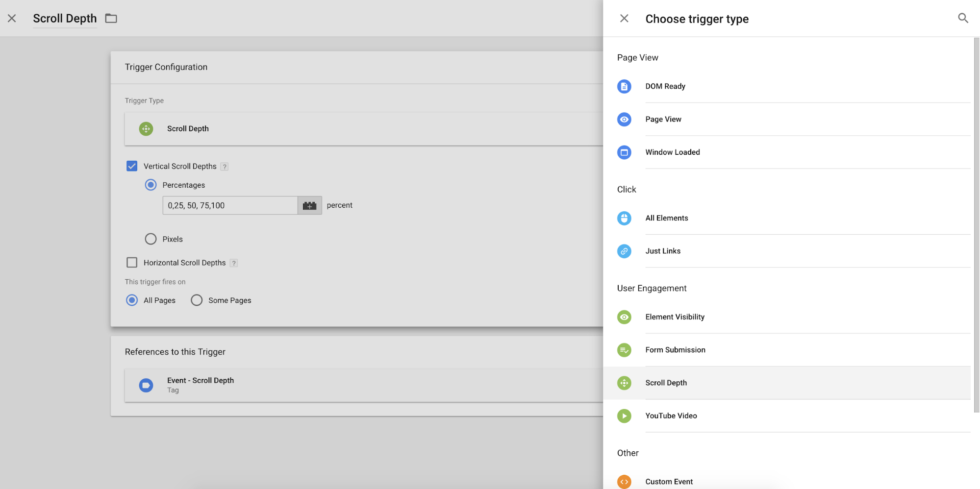
When you create this trigger you will see a number of settings:
You can also choose to turn on scroll tracking only on some specific pages. For example, consider the blog section of your website.
An example of the settings are then as follows:
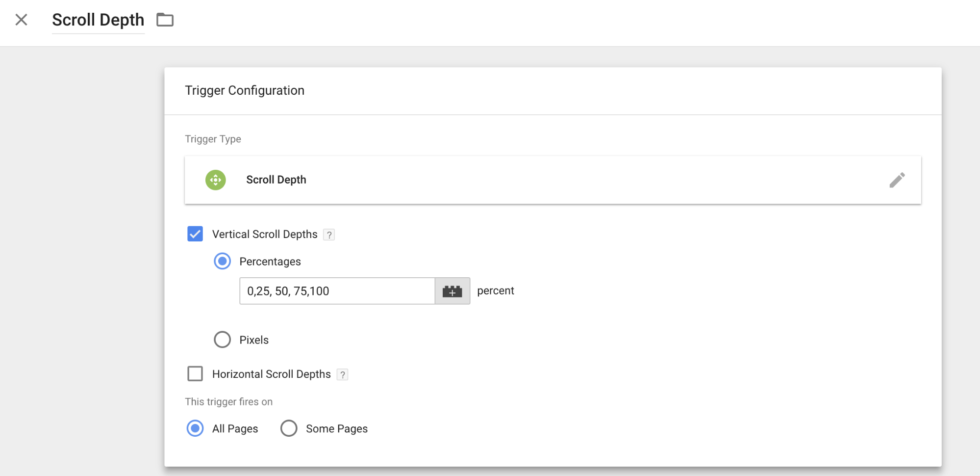
Be sure to include the 0 value as well. This is because Google Analytics will immediately display a percentage of the total on this page.
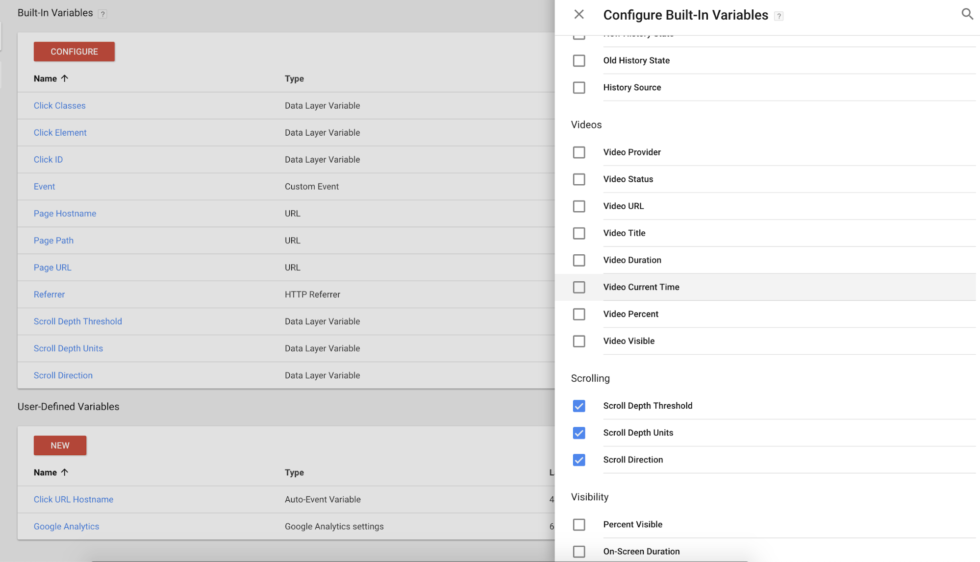
GTM has already added a number of variables by default. You can check these under variables under “Configure”.
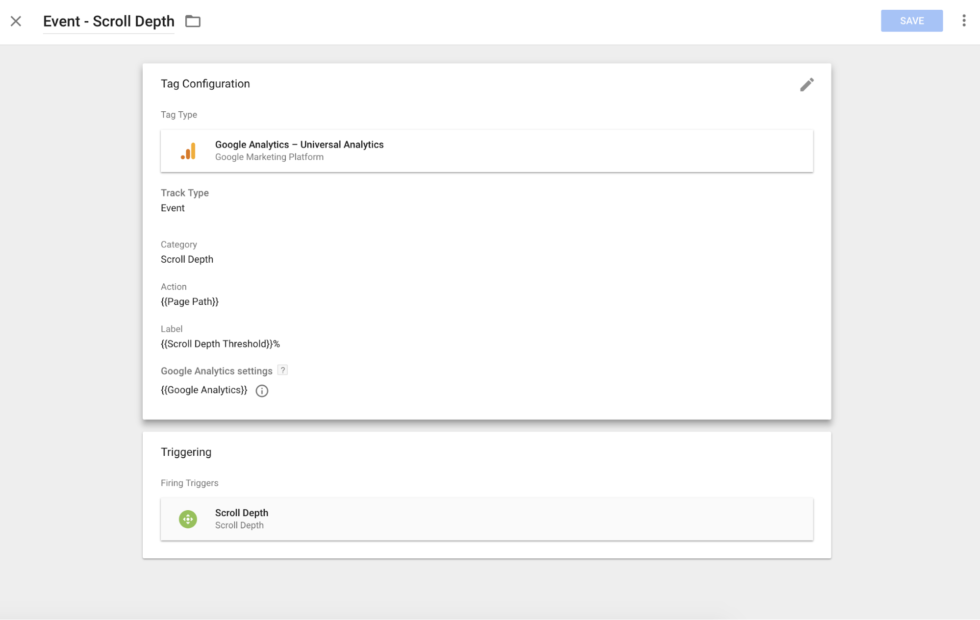
In the last step, create a tag in which you specify what you want to call your created event. Give this tag a recognizable name, for example: Event - Scroll Depth.
Fill the category with the name you also want to see reflected in Google Analytics. In this case “Scroll Depth”. Event action I fill with the name of the page, so you can easily see on which page a user scrolled. In the event label, you then enter the variable {{Scroll Depth Threshold}}%, so it will be filled with the percentages you specified beforehand. You can also choose to make it a non-interaction hit so that this event has no effect on your bounce rate (or it does if you choose).
With the preview function, you can now test whether the settings are to your liking and make any necessary adjustments before publishing the changes. For example, check with the plug-in data player Whether the events are coming in properly.
Just be careful with these settings. If a visitor arrives at the very end of the page or jumps down automatically via an internal page link, the scroll percentages are also sent along. This while the user has not actually scrolled. Even with very short pages, the percentage will soon be high. Keep this in mind when analyzing.
This article was published on Nov. 29 at Webanalists.com
 Nederlands
 English